Today was a little bit of a sad day for us on the homestead. Our Buff Orpington hen passed away. I always felt bad for her because of her life history. She was originally owned by Craig's grandma as part of a small backyard flock of 2 hens. The other hen passed and she was given to Craig's uncle, who already had 4 hens. She was lucky to have survived that transition. Then she was given to us with the other 4 hens and moved with us to our new house. I think she enjoyed having the room to roam and could easily escape from the other hens if need be.
Yesterday she seemed a bit off. She spent a lot of the day by our sliding glass door looking in. I just figured she wanted to be where it was warm. This morning we found her sitting by the front door. When the kids went to pet her, she didn't even try to move, which is highly unusual. She just laid there and eventually shifted to her side. I sprinkled some food by her, hoping she would eat something, but she just laid there. I found the other 4 hens eating her food and practically standing on her! Chickens are so mean to each other. She passed before it was time to pick up my daughter from school.
I think she must have gotten sick, although she didn't have a whole lot of symptoms. She was just lethargic and had some watery poop. It's really too bad, because she had recovered so well from Roxy, our large dog, gnawing on her leg. You couldn't even tell the dog had touched her. Fortunately, the other 4 hens are acting normal, so it seems to be an isolated incident.
My two boys and I had the task of burying her in the yard earlier today. It was sad, but the kids seem to be fine with it. I have tried to help them understand the circle of life and that things live and things die, and I think that's helped. It also doesn't hurt that we have 25 other hens in the garage.
RIP Shirley.
Wednesday, December 19, 2012
Sunday, December 16, 2012
Where my eggs at?
Since we've moved to our new house, we've gotten around 4 eggs from our chickens. That's 4 eggs in the last six weeks. I wasn't too concerned because it is winter and hens tend to stop laying in the winter. I've been reluctantly buying normal eggs from the store to satisfy our egg needs.
Our 5 hens have been wandering aimlessly around our property, taking care of all the bugs and weeds. When we first started watering all the fruit trees, a bunch of grass started popping up around the trunks. Those chickens took care of it in no time. They gobbled up the grass, pooped all around the trees and then scratched all dirt around them and worked the "fertilizer" right into the soil. It's the greatest thing ever to let the chickens take care of weed control.
So yesterday, Craig was working out in the yard and discovered 2 eggs under some roof tins by the barn. I knew they were laying somewhere in the yard, that was not in their nesting boxes! We took them inside and I was silently praying they were not rotten. Who knows how long they had been sitting out there. Fortunately, it's been pretty cold, and the eggs have a nice, protective coating on them when the chickens lay them, to help them last longer. So I took those eggs inside, washed them off and stuck them in the fridge.
Sunday mornings are waffle mornings for us. We make a bunch of waffles and feast. As I was making the batter, I went to get 2 eggs and saw the ones we found yesterday. I thought it would be a good idea to use them. I'm not going to lie. My hands were shaking as I went to crack them. In my head I was thinking, "Please don't erupt in an explosion of rottenness!" To my delight and surprise, they were the best looking eggs I've seen in a while. The yolks were dark orange and thick and the whites were super thick too. When I beat them, they were so thick. I was in heaven and was thinking that these were going to be the best waffles ever! And they were.
It was a total bonus for us. Not only are the chickens acting as our pest and weed control, they are laying superior eggs because of it. Healthy chickens lay healthy eggs. They look way better than the ones they even laid at our old house. Needless to say, I am loving life here at the new homestead. I can't wait to set loose our new batch of chicks in the yard and let them have at it!
Wednesday, December 5, 2012
Baby Chicks

Our baby chicks came about 2 1/2 weeks ago and I'm dying for them to turn into big egg-laying chickens. This is what they looked like at 2 weeks. Isn't it amazing how fast they grow? I've got so many different breeds that I can't even keep track of them all! They are a bit high maintenance though. I have to change their newspaper lining daily and I'm constantly having to refill their food and water. They eat and drink A LOT. It will all be worth it in the end when we have eggs coming out of our eyeballs.

We ordered from Murry MacMurry hatchery and got the rainbow egg layers. This means that we have a variety of breeds that produce several different egg colors, including brown, white, green, and blue. I'm excited to have a basketful of colorful eggs. The little day old chicks came in that tiny little box.
For reference, you can see my daughter holding the box. It's small. I got a call at 5:45 am on a Friday from the post office letting me know that my chicks had arrived. I woke the kids up and we headed out in our jammies and got to go in the back entrance of the post office and pick them up. We heard a lot of peeping coming out of that little box.


We came home and immediately unloaded them into their cage we had set up for them. They were so cute and fuzzy.

Look at those cute little guys. There were 26 sent to us but one didn't make it, so now we have 25. We also still have the 5 we brought over from our old house. The plan is to "harvest" them. I'm not sure if I'll be able to do it. I'd like to do it at least once, just so I know how to do it and know how to cook them so they're palatable. These little chicks are growing so fast that I think the time to harvest will come quicker than I expect. Eeeeeeeeek!
Thursday, November 29, 2012
Canned Turkey

I've been pretty busy this week with school and house stuff. I've finally gotten some motivation to do some deep cleaning. Aside from that, we canned one of the turkeys we bought. Craig and I make a good team - he de-bones and I can. If you decide to try this sometime, make sure you follow the directions exactly as they come in your canning booklet that comes with the canner. You definitely do not want to mess around with meat. We have a 16 quart pressure canner/cooker which is great for this kind of thing. After Craig de-boned the turkey, I cut it up into canning size portions and cooked in our small pressure cooker for about 5 minutes. It was just barely done with a little pink still in the meat. I then stuffed the meat into quart size jars and filled with boiling water and then processed for an hour and 15 minutes.
We love having the canned turkey. We use it in the place of canned chicken and every time it has been very tasty. I think I might like the flavor better too. I was able to get 7 quarts out of this turkey and have one more turkey that still needs to be done.
I've also been canning the broth I make from the turkey carcasses. I've done broth for 2 so far by boiling all the insides and bones for several hours. Then I let it cool, skim off the fat, heat it to boiling and pour into hot quart jars. Then I pressure can them for about 25 minutes.
The turkey haul up to this point has been:
20 lbs ground turkey
7 quarts canned turkey
9 quarts turkey broth
I still have one more turkey to can and 2 carcasses left to make broth. I think that's quite a haul for 4 turkeys that we bought for around $40. This should last us until next Thanksgiving when we can do it all over again!
Friday, November 23, 2012
Ground Turkey
We went a little crazy on the turkey this year. Last year we bought a turkey and canned all the meat from it. We liked it so much that this year we bought 4 turkeys: 2 for canning and 2 for grinding. Ground turkey is expensive in stores so we thought this might be an option to stock up on some meat. We've used turkey in place of beef for several recipes and have been pleased with the results.

We started by de-boning the turkey. That is Craig's job. He likes to do it and I'm glad he likes to do it. It's good to have someone in the house that knows how to do this. If you do not currently have someone doing this I would advise you to go on YouTube and learn how. In the picture above you see the end result. I saved all the bones and innards for stock. I also peeled the skin off and cut the meat into small chunks to fit in the grinder and then I ground away.

Once it was all ground up I packaged it in one pound portions in freezer bags and stuck it in the freezer for later use.

This will be an experimental year for us. We bought our turkeys frozen and thawed them to do this. I had always heard that once you thaw meat out it had to be used. I asked Craig about this before we did it, since he is the food safety expert. (His job involves running a kitchen for a hospital) He believed that as long as the turkey was ground before it was in the temperature danger zone for too long, it should be fine. We also figured that since we processed it and repackaged it, they would not get frostbite. I will have to give you an update later this year to let you know if we get sick from the meat or if it gets frostbite. I'm thinking it will be good. I am excited about all the ground turkey, regardless.
This also was a wise investment for us. We calculated the cost of the turkey and figured out that our ground turkey came out to around a dollar per pound. This is not even counting all the turkey stock we will get from the carcass. Plus, now we have 20 pounds of ground turkey in our freezer! Booyah!
Wednesday, November 21, 2012
The Property

Before I get to my turkey posts, I thought I'd share with you our new property. As you can see above, there are a lot of fruit trees. A LOT. The pictures above and below are of the orchard in the front of our yard. This orchard has orange, lemon, grapefruit, kumquat, loquat, tangelo, pomegranate, apricot, peach, cherry, and avocado trees. In this area alone, I would estimate that there are about 30 trees. We also have olive trees next to the house.

We have plans to add some apple, walnut, and almond trees, as well as a bunch of grapevines and blueberry bushes.


Right smack dab in the middle of our property is a super old guest house. It's probably about 600 square feet. From what we hear, it was the old caretaker's house for the groves. Our whole neighborhood used to be grapefruit groves.

This is the barn. If you cannot tell from the picture, it is bigger than the house we live in. This thing is gargantuan. Rumor has it that it was built sometime in the 1800s. I've been making some calls to local historians to see if I can find out it's story.

This is what we have been using for our chicken coop. It's a little structure built right onto the side of the barn.

It even comes with a little covered run! Our chickens have been enjoying the property quite a bit, but that's a post for another time.

Here's a look at the inside of the barn. Really, pictures do not do it justice. It's like those huge cathedrals with the super-high ceilings. It's one of those things you have to see in person. This is only one section. It is divided into three. As you can see, it needs a little cleaning up and the roof needs some work.

This is the middle section. It is huge! Craig has decided to set up his gym in here, which is awesome because now I might be able to park the car in the garage!

The third section of the barn. Not too much here, except the little door on the side goes to the chicken coop.

And last, but not least, the orchard in the back. These are giant grapefruit trees that I'm guessing were part of the original orchard. My kids were excited to pose in several of the pictures, can you tell?
The whole lot is supposed to be .68 acres, but it sure feels like a lot more.
This concludes our tour of the Pulsipher property. Thank you for coming and donations for the barn roof repair are always welcome. :) Have a nice day!
Monday, November 19, 2012
I'm baaaaa-aaaaaack!
And you thought you could be rid of my Amish posts! Ha! It's only just begun!
I have had a busy couple of months, you see. I suffered a miscarriage early in September and spent a lot of time dealing with that. Then, at the end of September, we FINALLY got an offer accepted on a house and moved in! It was an experience 3 years in the making. We had decided to settle for a normal tract house, a starter home, if you will, but as things turned out, we got everything we wanted and more! We now reside on a lot of .68 acres with about 40 fruit trees, a barn, AND a guest house! Our dreams have finally come true.
We are truly thankful we had the patience and the means to hold out for what we really wanted. And we are thankful the Lord answered our prayers and then some.
The adventures have already begun and we've only been here 2 weeks. Our chickens have been gnawed on, we got some new baby chicks, and we've got old pipes breaking all over the yard. Not to mention all the galvanized steel piping from when our property was all grapefruit groves (which we are afraid to touch since we heard it could crumble into dust if you mess with it).
Let the fun begin!
P.S. Expect a lot of turkey posts. It is Thanksgiving, you know...
Monday, August 27, 2012
Corn Tortillas

I finally attempted some corn tortillas. I bought some masa a few weeks ago, wanting to make them, and finally got around to making them this week. I found a recipe online from Rick Bayless. I liked it because it was so simple: masa harina and water. No wonder corn tortillas are so cheap!
My only complaint would be that they're a little thick and that's probably because of my tortilla press. It just doesn't get them as thin as I would like. I roll out my flour tortillas with a rolling pin and may have to try doing the same with these. Even so, they taste great. Last night I made tiny enchiladas with them. I was proud that there were homemade tortillas in there, even if they were a little thick and small. It's something that gets better the more you do it, right?
Wednesday, August 22, 2012
Bears and Catfish

At this point I was pretty freaked out. As we got ready for bed, I tried to make sure all the food was cleaned up and put away. I even put the trash in our car. I did not want that bear anywhere near us while we slept. After we put the kids to bed, the grownups talked for a bit and then we headed to bed ourselves. I was confident that no bears would visit us that night. Oh, how wrong I was.
I kept hearing footsteps all night and was freaked out. Then we hear a loud bang - - our trash can getting knocked over. This trash can was 6 feet from our tent. I huddled inside my sleeping bag and prayed the kids wouldn't wake up. Our friends in the next tent over got out and looked (they're crazy!!) and it was a HUGE bear looking around in our trash. It finally went away and the people across from us packed up their campsite so fast, I think they put the tent in their car fully assembled.
A few hours later, I heard rustling, and sure enough, the bears were back. This time it was a mother and her 2 cubs. Even more scary! Day could not come soon enough. That morning I found candy wrappers in the trash that I had missed. Doh!
Craig said this was the best camping trip he had ever been on.
Before we headed home, we went to the pond again to try our luck at catching some catfish. We used our leftover hot dogs for bait and I caught the fish you see above. When we got home, Craig filleted it and I cooked it.

Monday, August 20, 2012
Rock Fish
Last Thursday, I had a chance to go deep sea fishing with some of Craig's family out of San Diego. I had been once before with my family and was excited to go again. I remember catching something every time I put a line in the water. This fishing trip was a little different, though. We only went for a half day, so we didn't get to go that far out into the ocean. We were still pretty close to the land, which was a bummer. We also found out when we got there, that they had no anchovies for bait, which I learned was very bad. We used squid and sardines. On top of all this, there were pelicans and sea lions all over the place, scaring away the fish. There were not a lot of catches happening. There was one guy that caught a shark in the first fifteen minutes we were out there, but he had to throw it back because it was too small. At the end of the day I had 2 small fish in my bag, both Rock Fish, I believe. They seemed big at the time I caught them, but as you can see from this picture, they were not big at all.


I took those fish home, and filleted them myself. I wanted to get better at doing it. I realized that having a fillet knife would have been good, but my kitchen knives eventually did the trick. I was able to get some meat off of those tiny fish.

I figured the quickest way to cook it was to put a little salt and pepper on them and fry it up in some butter. I wanted something fast and easy, as I was still stinky and sweaty from the fishing trip.

Probably not the healthiest way to enjoy my fish, but it sure tasted good.

Craig and I gobbled this up pretty quickly. Maybe next time we go I'll catch a giant fish and can make more than these tiny fillets. Wishful thinking, I know.
Tuesday, August 14, 2012
Italian Feather Bread

When you make cheese, there is a lot of left-over whey. I always feel bad if I pour it down the sink. It seems like such a waste. When I got my cheese-making kit from the New England Cheese-Making Co., it came with a recipe book that included recipes to use the left over whey. One that caught my eye was Italian Feather Bread. With a name like that, how could you not try it? We did, and really liked it. Especially when we dipped in in roasted garlic and Italian seasonings in olive oil. It was just like at Italian restaurants that give you their delicious bread to dip in the garlic and olive oil. The only difference is that I used 100% white wheat flour to make it. Here's the recipe:
2 packages yeast
1 T sugar
1 c warm water
1/3 c butter, cut into small pieces
3/4 c hot whey or milk
2 t salt
5 1/2 to 6 c flour
1 lightly beaten egg white
Cornmeal
Stir the yeast, sugar, and warm water together in a large bowl. Let sit until yeast dissolves and starts to proof.
Meanwhile, melt the butter in the hot whey and let cool to lukewarm. Add salt and combine with yeast mixture.
Stirring vigorously with a wooden spoon (or in a mixer with the dough hook) add the flour 1 cup at a time, until the dough starts coming away from the sides of the bowl. The dough will be sticky.
Turn out the dough on a lightly floured surface and knead until it becomes easy to handle. Knead for 2-4 minutes with well floured hands.
When the dough is soft and smooth, let rest for 5 or 6 minutes. Divide in 2.
Roll each half into a rectangle and roll up starting from the wide end, pinching the seams as you roll.
Grease a large baking sheet and sprinkle cornmeal over the top. Place the loaves on the baking sheet. (If you like those fancy marks on top, cut four slits with a sharp knife) Let them rise in a warm draft-free place until doubled in bulk, about an hour. Brush with beaten egg white and bake at 425 for 30-40 minutes or until the loaves are a golden color and make a hollow sound when you tap with your knuckles. Cool on a rack and serve fresh.
*I don't usually do the egg white on top, although it does make it look nice and shiny on top. I just find that when I brush it on, the bread collapses and it becomes more flat in stead of round. I spray the top with cooking spray instead. Also, since it makes 2 loaves, you make make one for right then and save the other for later. I have frozen one loaf and thawed it when we were ready to eat it and it was still moist and delicious. Or you can share a loaf with your friends. :)
Friday, August 10, 2012
Hard vs Soft
 |
| Soft White Wheat |
 |
| Hard White Wheat |
But then everything changed when I read a friend's blog about the subject. Apparently, hard wheat is better suited for yeast-based breads, which is a good thing, because that's what I was using to make my bread. Soft wheat is best suited for quick breads and baked goods that use some kind of leavening, like baking soda or powder. It's comparable to the expensive whole wheat pastry flour you can get at the store.
When I was up in Utah, I decided to buy a giant bucket of the soft white wheat and give it a try. I've tried it in tortillas, muffins, and brownies and have hardly noticed a difference in taste. It seems like the soft wheat has a similar flavor to white flour with the added bonus that it actually has nutritional value. I used it in cornbread for dinner, and I suspect that it will be delicious.
I'm excited to have gained this new knowledge. I've been trying to cut out white flour, but there are some things that just taste better with it. Now that I've discovered the soft wheat, I think I may never have to buy white flour again! Plus, buying wheat berries is sooooooooooooooo much cheaper than buying it ground. You can seriously buy about 6 months of wheat for about $20. When you grind it yourself and make your own baked goods, it will save you boatloads of money, not to mention you save your body from all the nasty additives the food industry is so fond of.
So what are you waiting for?? Go get some wheat!!
Wednesday, August 8, 2012
Silly Chicken

While we were on vacation, we had a friend watering our plants and taking care of our chickens. She would come by once a day and make sure the chickens had food and water and collected the eggs. When we came back, we were unloading everything and putting stuff away when Craig noticed there were 2 eggs in our bike trailer. He thought we had put them there. We had not.
We were a bit baffled, but took the eggs inside and put them in the fridge. The next day I looked out my kitchen window and saw one of the chickens in the trailer laying an egg. I took a picture through the window because I thought it was funny. It seems that this chicken kept squeezing through the gate and laid eggs here while we were gone. It makes sense, since usually the dogs are back there and keep them from coming through the gate. Our dogs were in a kennel, so they had free reign back there.
Chickens are so weird.
Monday, August 6, 2012
Dried Cherries

While up in Utah visiting my family, I picked up some cherries. Is it just me, or does it seem like cherries are dirt cheap this season? There must have been a great crop this year. Anyhow, I had been wanting to try drying cherries for a while, but never did because I never had a cherry pitter. I sure wasn't going to sit and cut all those cherries to get the seeds out. Fortunately for me, my mom has one. So we decided to try drying these cherries while I was up there.

Here's a wonderful shot of me pitting the cherries. We had to do it outside because it's a messy job. You basically stab each cherry with a metal rod, which pushes the seed out into it's own little container. As you pull the rod up, it drops the cherry and it slides out into a bowl you set on the side. It took no time at all to pit my bag of cherries. The juice splatters all over the place, which is why you wear clothes you don't care about.

My son decided to help out. I'm not sure if you can tell, but there are cherry juice splatters all over his face and clothes.

After pitting them, we placed them on the dehydrator and left them there for about 18 hours. My mom checked them periodically, and if they were done, would take them out.

We ended up with a small bag of the dried cherries and I would say they were pretty good. I made some granola cereal and added them to it and it made a pretty tasty breakfast cereal. I must say, though, I do prefer canned cherries over dried. Maybe if I go up there next summer we will can them instead. Maybe if I get a decent crop from my cherry tree I will can them. I guess I'll have to wait until next year.
Friday, August 3, 2012
Dried Apricots

Round 2 for the apricots. After canning a bunch of apricots, there were still quite a few left to dry. I had tried this last year, with disgusting results. I think I may have left them in the dehydrator for a little too long. Or maybe a lot too long. They were crunchy and gross. While I was up in Utah with my mom, I got some tips for drying them, since she used to do it all the time. The first tip I learned was to turn the halves inside out, like you see in the picture above. This lets them dry a little more evenly since the moist parts are exposed.
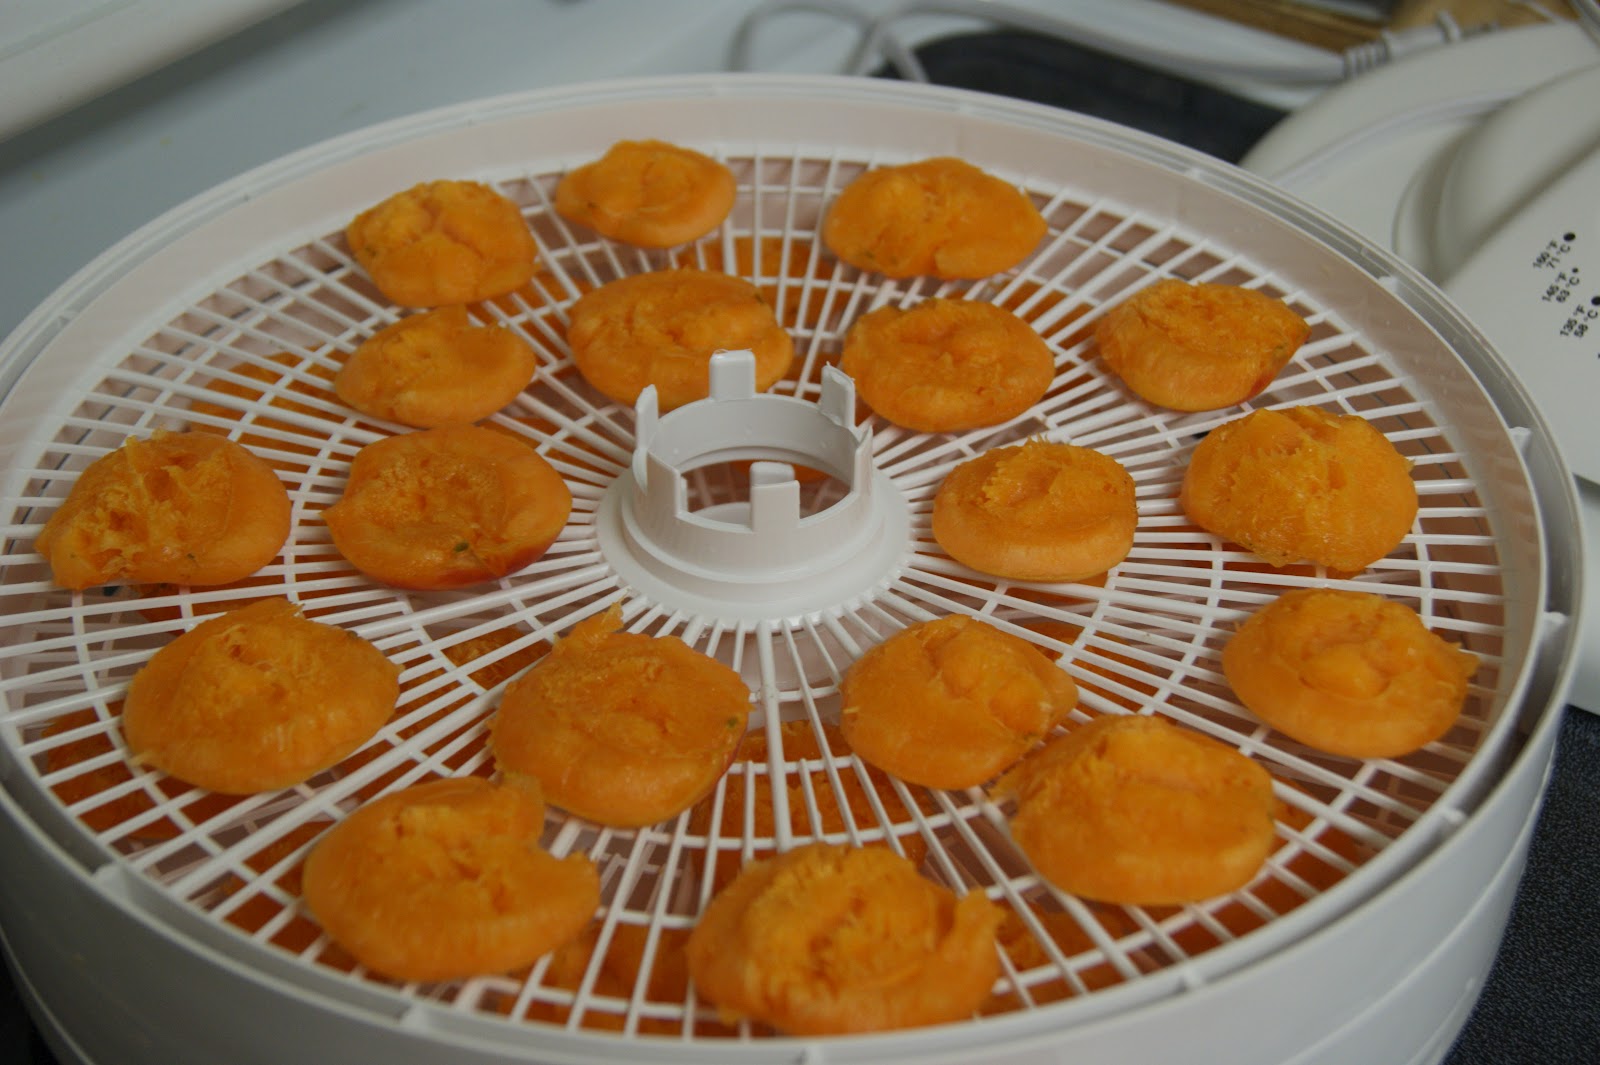
Then we laid them on the dehydrator with the skin side down and turned it on for about 8 hours.

The apricots did brown quite a bit, which is normal, since we did not treat them with anything before drying them. They don't look too appetizing, but they taste pretty good. I've heard that if you soak them in a citric acid solution or lemon juice, they will keep their color, but I have yet to try that. I remember soaking them in lemon juice last year and all I remember is that the lemon totally masked the apricot flavor.
I think drying is really a lot of trial and error, but if you can get it right, it's a great way to preserve the harvest.
Wednesday, August 1, 2012
Canned Apricots

You may have noticed an absence of posts last week. This is because I was up in Utah visiting my family. Fortunately for me, my mom and I came across a fruit stand selling apricots. I was really excited about this because I usually am given apricots every year by friends whose trees are overloaded with them. This year, however, those trees were not overloaded. I had accepted the fact that I would not be able to can any this year, which for me was a little sad. Canned apricots are nostalgic for me. My mom canned them every year and we always had a ready supply. So when I saw the large boxes of apricots, I went and bought a large box. I decided to can some and to try drying some. Here's how I can them:

I washed them, tore them in half, and removed the pit, then stuffed them in these quart mason jars. We had made a syrup by combining 1 1/2 cups of sugar per quart of water. This we dissolved and brought to boiling and then poured into the jars filled with apricots.

After wiping the lip of the jar to ensure a proper seal, we screwed on the lids and placed them in this water bath canner. I do not have a water bath canner, just a pressure canner, but this sure was convenient. I'm told that they are very inexpensive too. Maybe some day I will pick one up.

If I remember correctly, we processed them for about 35 minutes and then pulled them out to cool.

This was the final result. We ended up with 14 quarts. I have to say that canning is a lot more fun and a lot easier when you do it with some one. Everything I have canned to date has been by myself so it was nice to do this with my mom. It time passed quickly and we were able to do a lot in a small amount of time. Maybe next time I so some serious canning I'll invite some people over.
Monday, July 30, 2012
Laundry Detergent

I finally got around to trying my own laundry detergent. I had bought all of the supplies a long time ago and was just waiting to use up what I had. I was pretty excited about it too. All I needed was what you see above: 4 lbs of Borax, 4 lbs of washing soda, 4 lbs of baking soda and 3 bars of soap. I used Kirk's because it has coconut oil in it and that sounded good to me. You grate the soap and mix all the ingredients well.

It filled up about half of one of my buckets. To use it, you just put 2 heaping tablespoons in the washer and watch it work its magic. I was quite impressed with the job it did. I had a pair of my son's shorts that had a stain on it. I had previously washed AND dried it and it didn't come out. Then I washed it with this stuff and when I pulled it out of the dryer the stain was gone! I am now sold on this concoction. I'm sure it's economical too. I haven't done the math, but I think this might be cheaper than commercial laundry detergent and it should last longer too, because it makes so much and you use so little with each load. I'm getting more Amish by the day!
Thursday, July 19, 2012
Hamburgers

I also made the patties myself. I used some ground chuck roast, mixed in 1 shredded zucchini, some chopped onion, and some minced garlic. The patties were pretty tasty. My biggest problem was that they were so wet, probably from the zucchini. They weren't staying together very well, so I added some egg and a small handful of oats. They were still pretty wet. In hindsight, I probably should have pressed the moisture out of the zucchini and it probably would have been better.
I topped my burger with some mayonnaise, one slice of beefsteak tomato, half an avocado, and a few leafs of romaine lettuce. It was quite delicious. I liked the idea of the zucchini in there. It added a little extra nutrition while acting as a filler and it also gives you another way to use up that zucchini. (You know if you grow them, you get way more than you need.)
How do you like your hamburgers?
Wednesday, July 11, 2012
Tomato Hornworms and Beets
I've been pretty lazy with this blog lately. Maybe because it's so hot, maybe because I've been sick. Anyhow, I did have a couple adventures I'd like to share.
First, I discovered my first tomato hornworm on my bell pepper plant. I had been warned about these on my tomato plants, but surprisingly have not found any on them, just 2 on the bell pepper plant.

It's actually a cool looking caterpillar. This is not my photo, by the way. I found it on wikipedia. It reminds me of the very hungry caterpillar. Which I'm sure it is, because they appear out of nowhere and get big fast. When I saw it I tried to pull it off the plant with my fingers and couldn't do it because it was squishy and it sticks to those stems like nothing else! I ended up getting some tweezers and prying it off. It took a good while to do it. It's like its feet are little suction cups or something. As soon as I pried it off I threw it in with the chickens, who were more than happy to take care of it. In fact they chased each other around trying to get it. I was almost a little sad I only found 2 since it made my chickens so happy.
Second, I've discovered that you can add beets to almost anything. I've had a surplus from the farm and was making recipes that featured beets, but I got tired of making them. Then I started adding a beet into meals, kind of sneaking them in and you can't really tell. I peel it and chop it and add it to whatever pot I'm using. It usually cooks nicely and you can't tell it's in there. I've added a beet to the pot of beans I make and it tasted delicious. In fact, it seems that the more veggies you add, the more flavorful it is. My last batch was half beans and half veggies. I also added one to my spaghetti sauce, and it was the same result. It makes me happy to be using these beets regularly. It sure does make it easier to get my 5 fruits and veggies every day.
Friday, July 6, 2012
Mozzarella 2: The Runny Edition

Monday, July 2, 2012
FYI: Cinderella can't ride a motorcycle

She initially asked for a green cake too, but I told her I didn't know how to make a green cake, so we compromised with a red velvet cake and green frosting to simulate the grass. I was pleased with the road I had made out of fondant, but things just got worse after that.
I suppose I should explain the situation. Instead of a separate birthday parties for my son and daughter, they decided that they wanted a birthday overnight camping party instead with a few friends and their families. Her birthday was the day after we came back. While on said camping trip, we had a few run-ins with some bears during the night, which left me shaking and wide awake through the night. (I will post about this adventure a little later.) When we got home, I had to start working on this cake so it would be done in time for her birthday. I made the green frosting and the road and it looked fantastic. I was feeling pretty good at this point. But I was pretty groggy. I was working on about 15 minutes of sleep from the night before. I tried to form a motorcycle out of rice crispy treats, chocolate molding and fondant and the results were a disgrace to all things motorcycle. It appears that when I am tired, quality just goes right out the door. Next I tried to form Cinderella, with the same results. I ended up trying to make Cinderella doing a superman and her head became a yellow helmet because I could not form a face. When I tried to stack them together, it tipped over again and again until I totally lost it and started screaming in frustration, which made both my daughter and little baby start crying. I had to reassure my daughter that I was not mad at her, I was just frustrated with the cake. At that point, I decided it was not worth it and "Cinderella riding a motorcycle" became "Cinderella was not being safe on her motorcycle and crashed." Let this be a lesson to you kids: Safety first!

Subscribe to:
Comments (Atom)